Block Google DNS on Asus
Contents
Block Google DNS on Asus
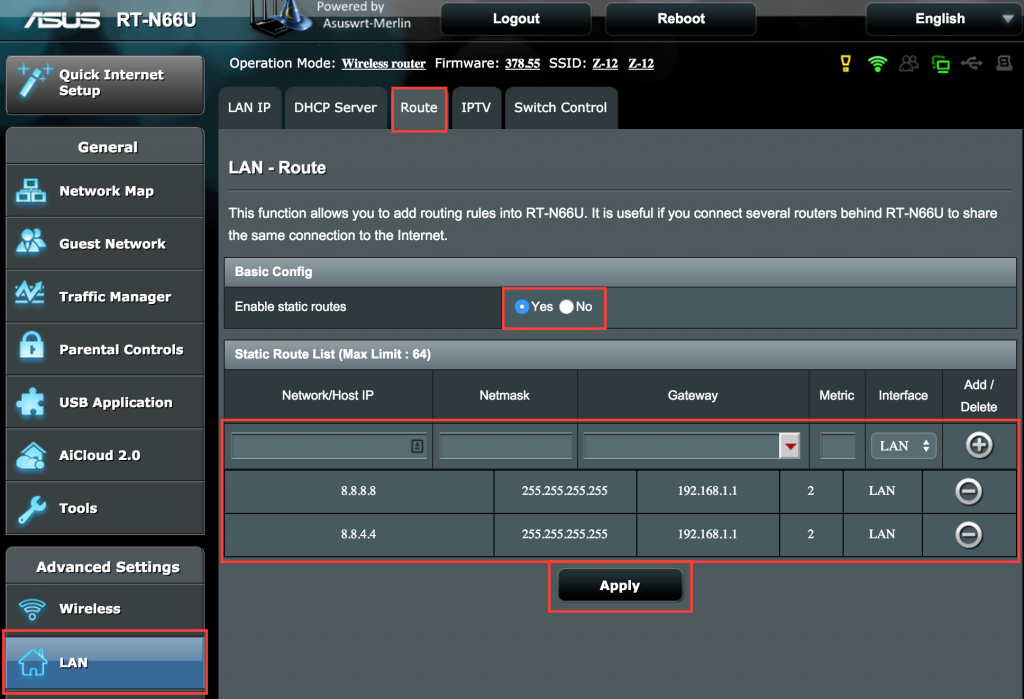
- Open the Asus settings page and navigate to: LAN > Route.
- Under Basic Config set Enable static routes to yes.
- Enter the following information:
- Network/Host IP: 8.8.8.8
- Netmask: 255.255.255.255
- Gateway: the router's own IP address, usually 192.168.1.1
- Metric: 2
- Interface: LAN
- Click the + button to save this entry.
- Repeat the procedure for Host IP 8.8.4.4.
- Click the Apply button to activate the two new routes.
- You'll end up with something like this:
Power-cycle your devices
To make sure all your devices use the new DNS settings, please follow these steps:
- Turn off the device.
- Unplug the power cable from the router.
- Wait 30 seconds.
- Plug the power cable back in.
- Turn the device back on.
Test your Google DNS block
We recommend that you verify the block by trying to ping Google's DNS servers.
- On Windows, please open a Command Prompt. On OS/X, open a Terminal instead.
- Enter the following command in the Command Prompt or Terminal:
ping 8.8.8.8
This will send a series of pings to the Google DNS server. If they all fail, your block is working properly.
- Repeat the test for 8.8.4.4:
ping 8.8.4.4