Uploaded the OpenWRT firmware to your router and not sure what to do next? On this page we help you set an OpenWRT password and enable Wi-Fi.
Network Cable
By default, OpenWRT does not enable any Wi-Fi network. You'll need to connect a network cable from your computer to the LAN port of your router to get through these first steps.
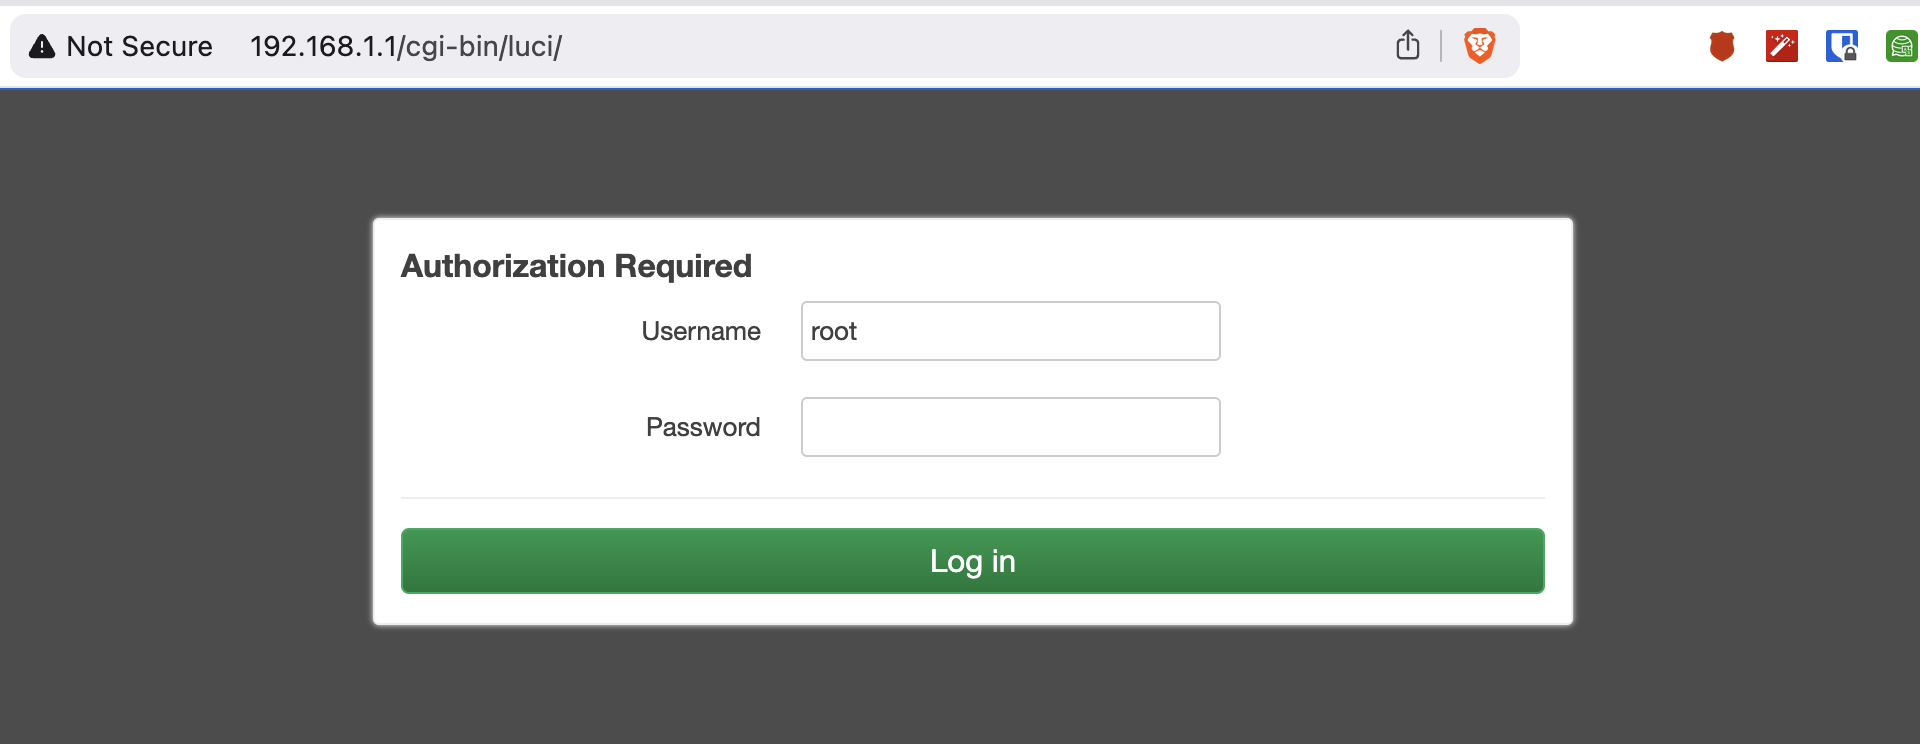
Login
Open http://192.168.1.1 in your web browser. The default login uses username root and no password.
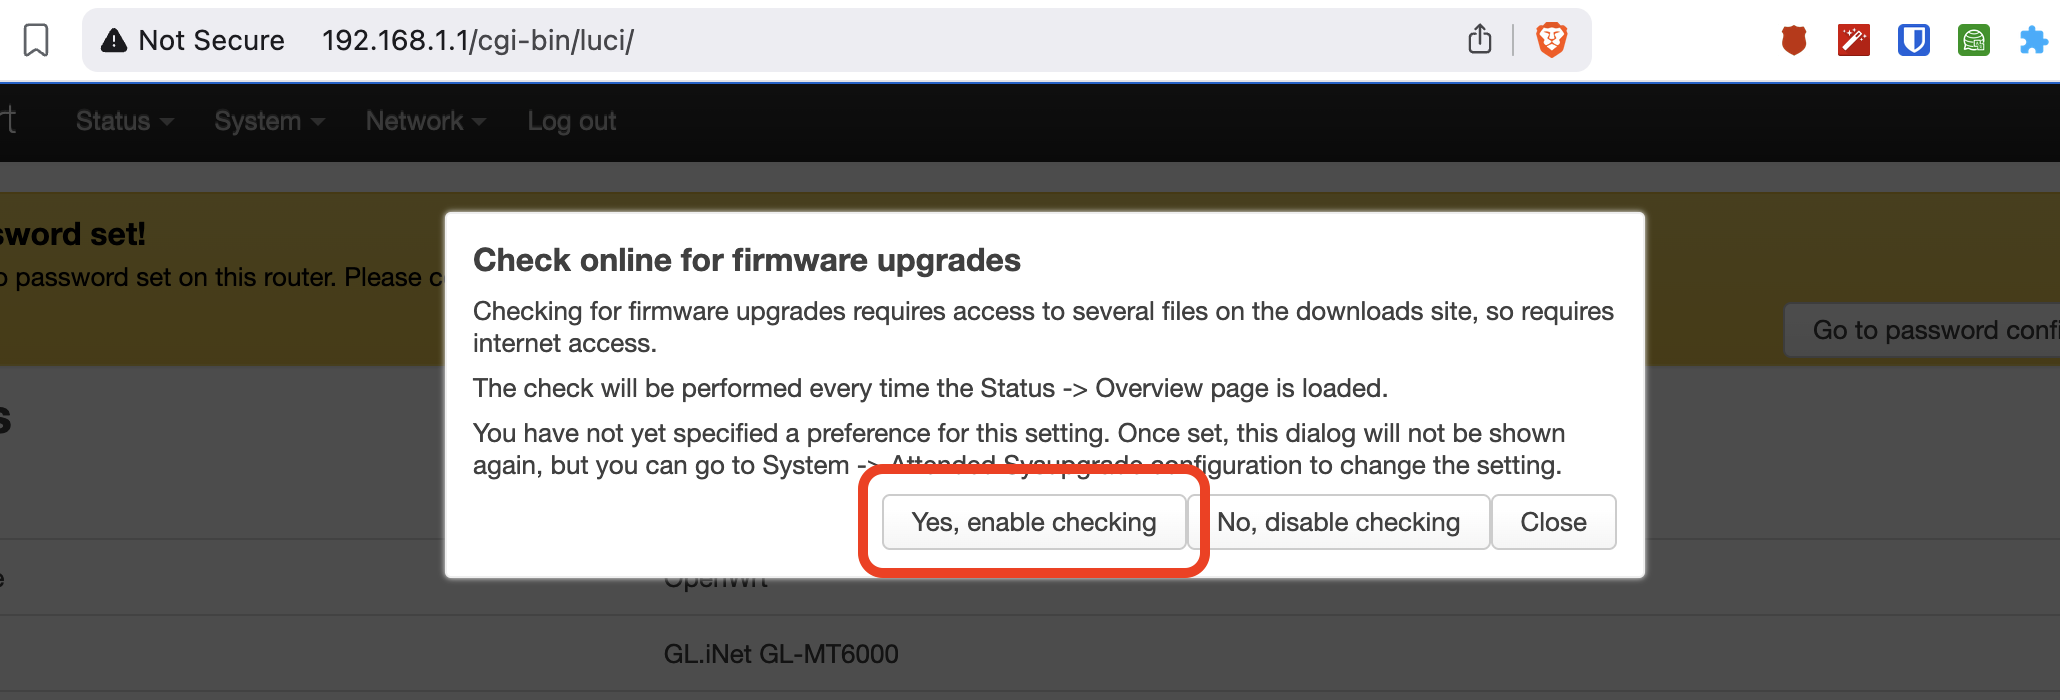
Update Checks
The router asks your permission to automatically check for firmware updates. This is not required, but probably a good idea.
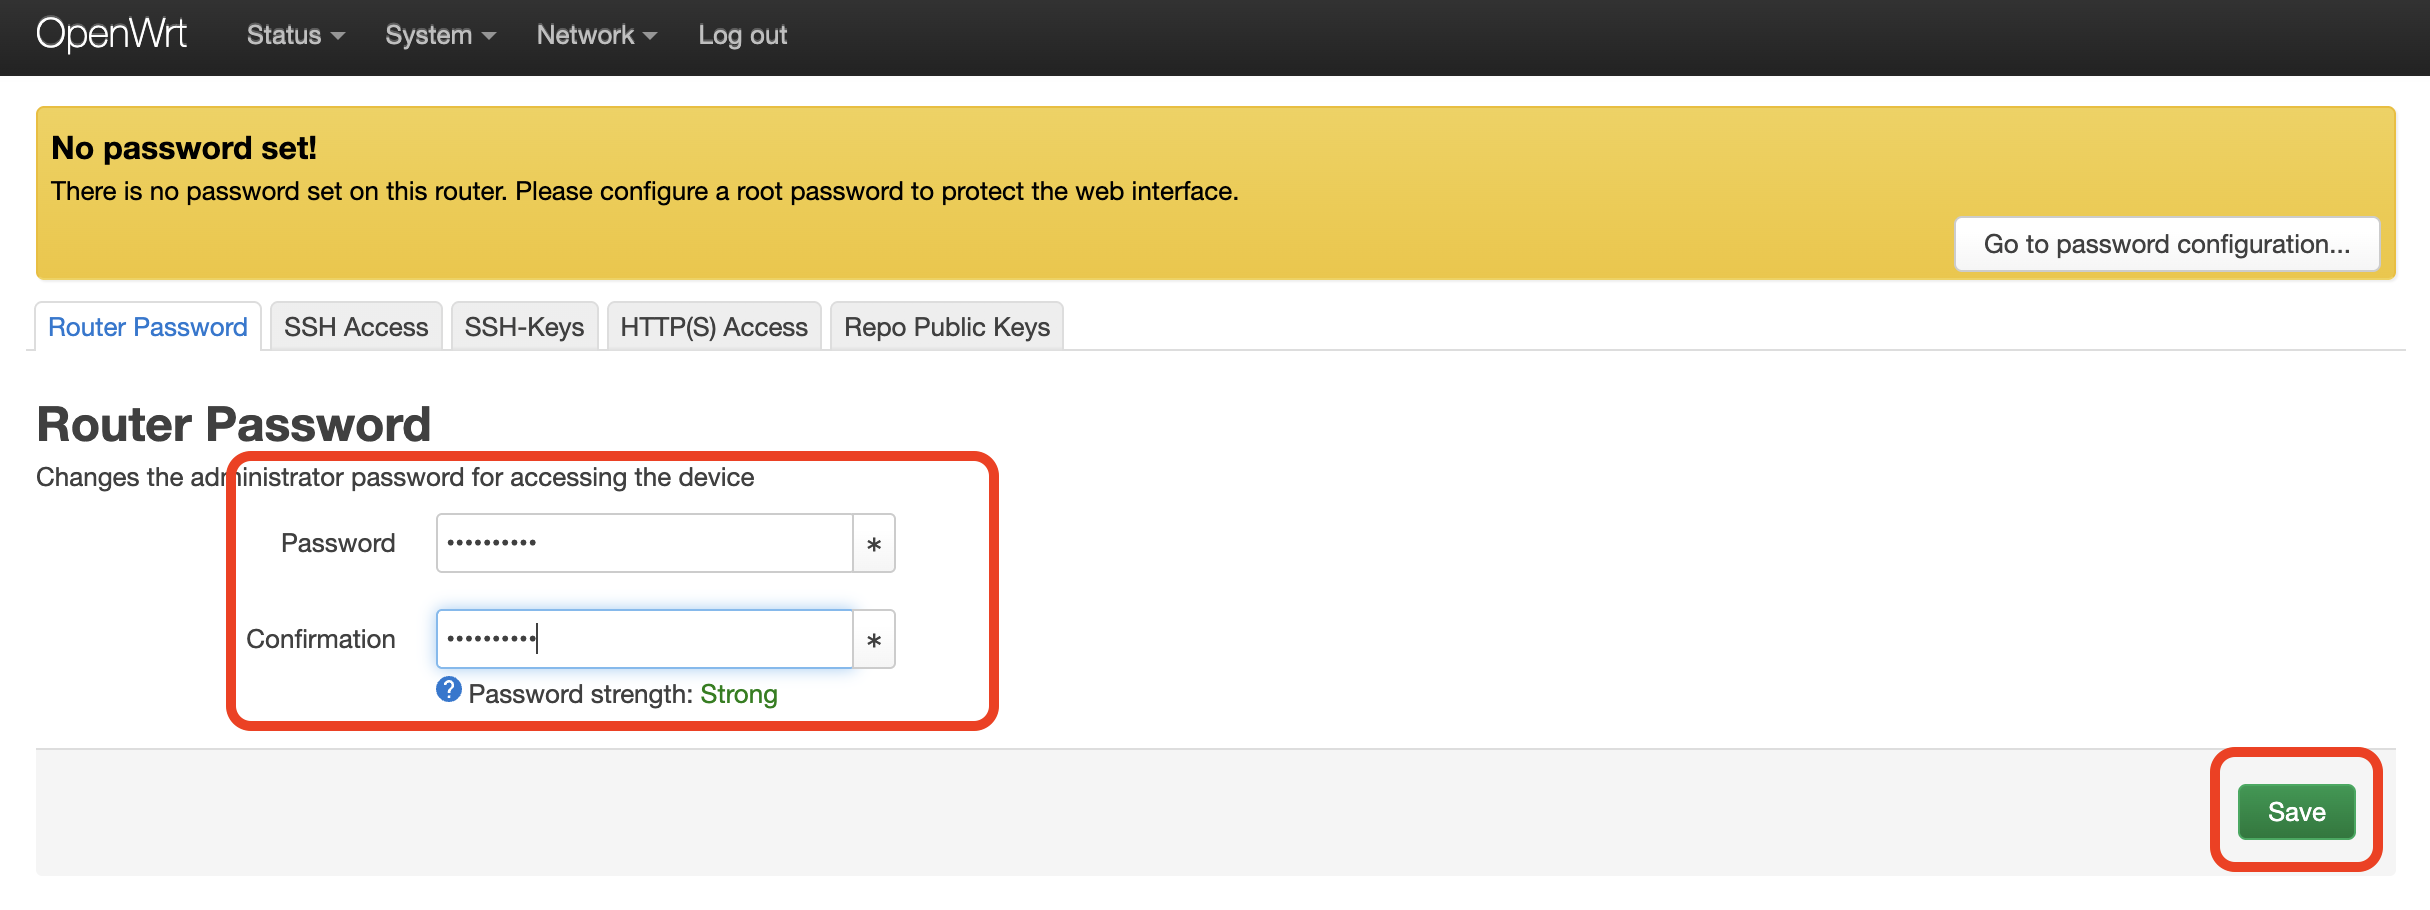
Password
You don't want visitors changing your Wi-Fi settings, to lets set a password.

Enter the password twice and click Save.
Setup Wi-Fi
OpenWRT allows you to change thousands of parameters. It can be tempting to want to "optimize" your settings immediately, but we highly recommend you refrain from doing so at this point. A single wrong setting can make your router unreachable. Lets get the basics working first.
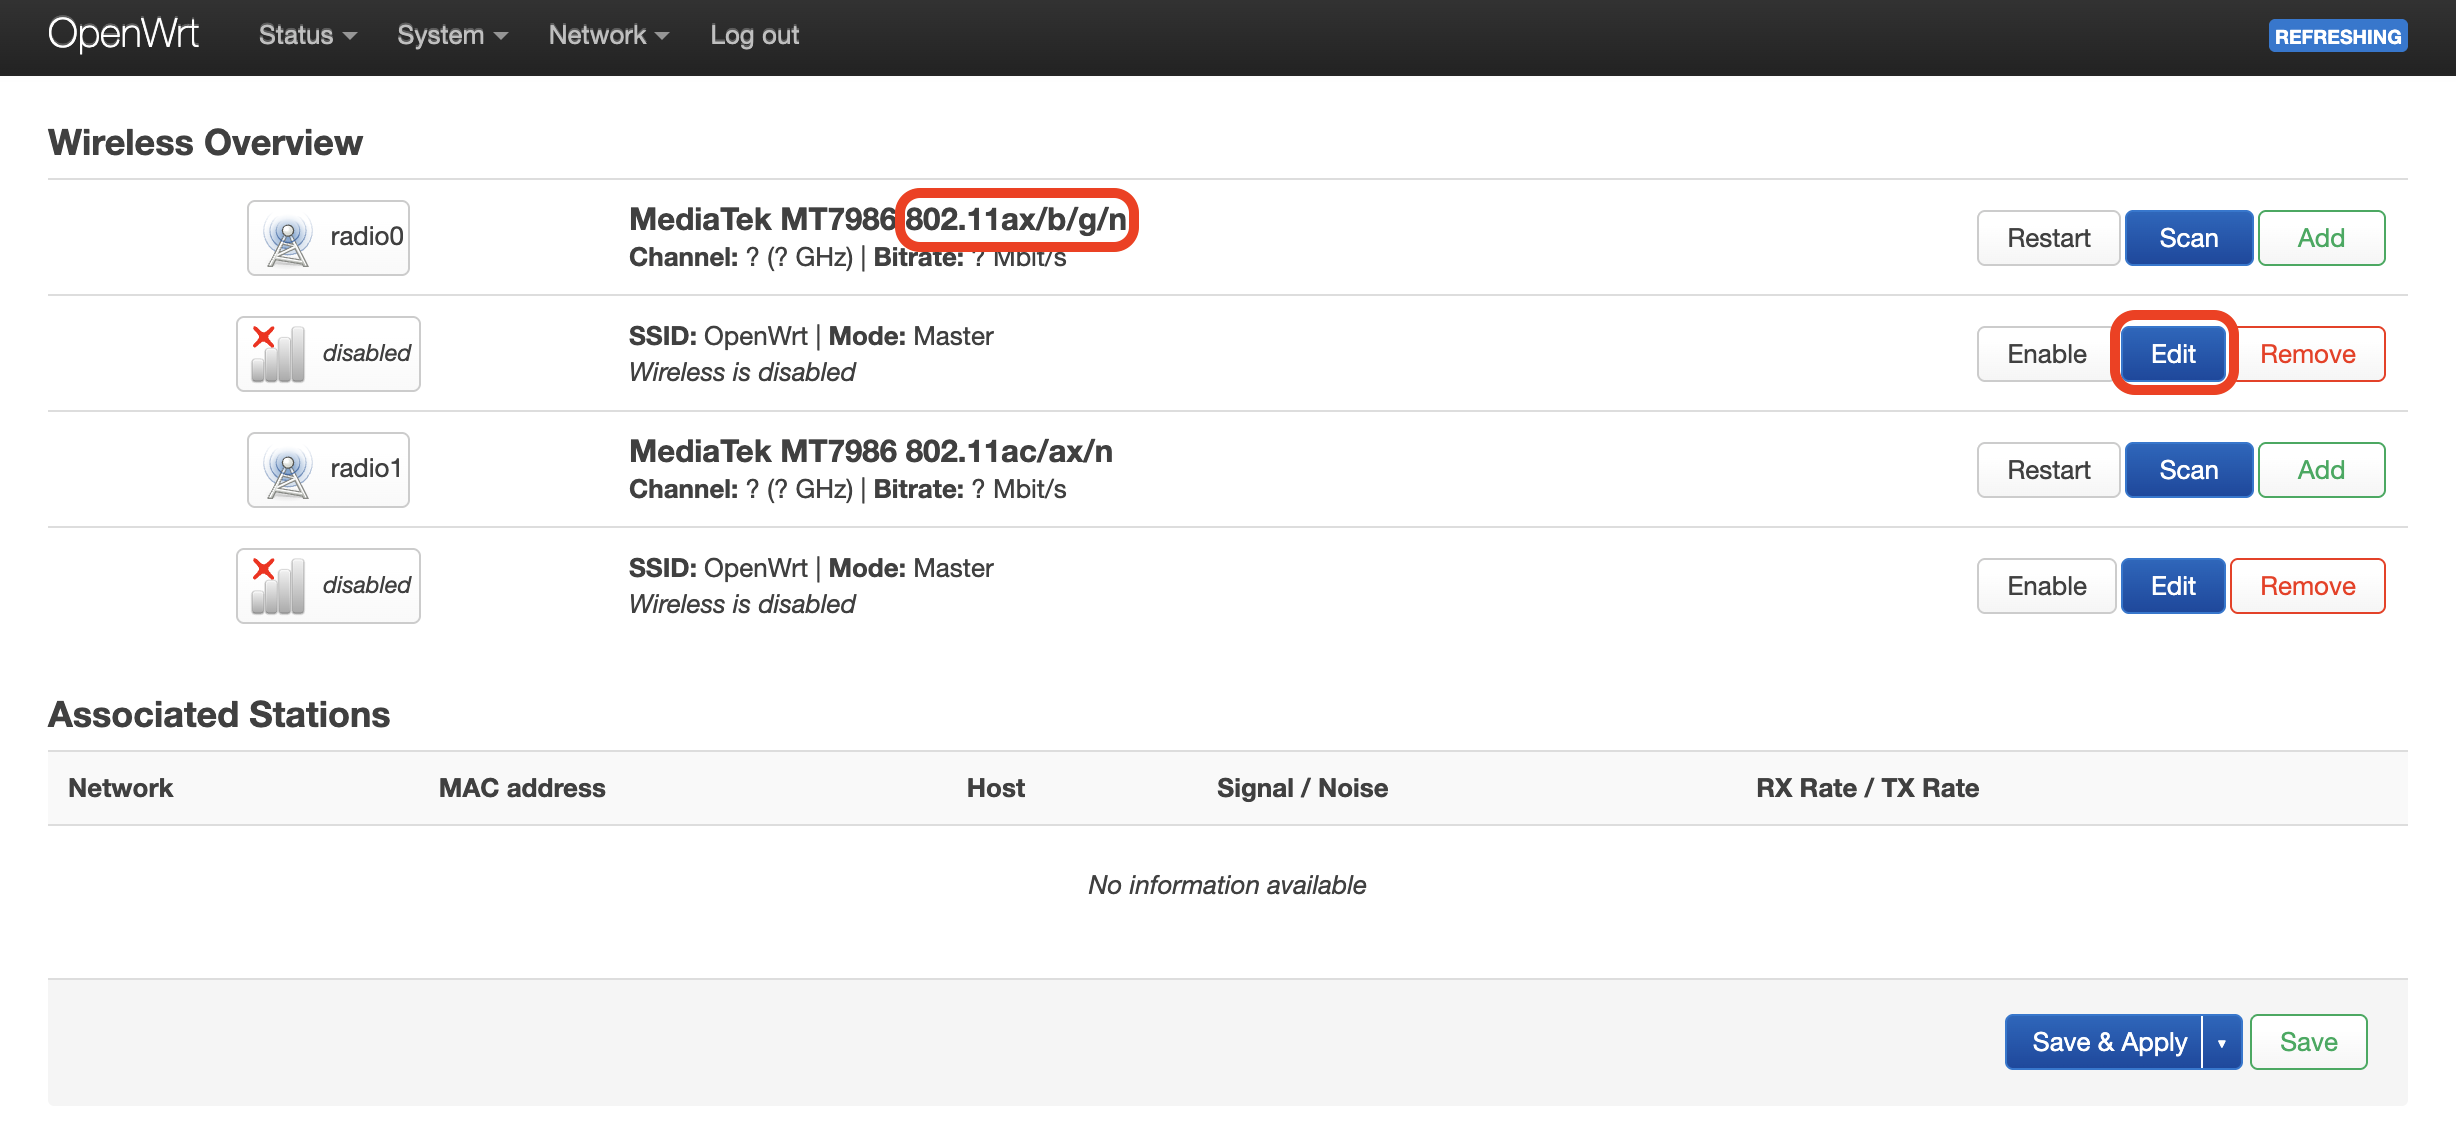
Navigate to Network > Wireless.
You'll find 1, 2, 3 or sometimes 4 different Wi-Fi radios, each accompanied with its own SSID settings. The 802.11b/g radio is compatible with most devices, so lets configure that SSID first.
Click Edit for the 802.11b/g SSID.
Please ignore the plethora of settings. Resist the temptation! One wrong setting can result in days of troubleshooting.
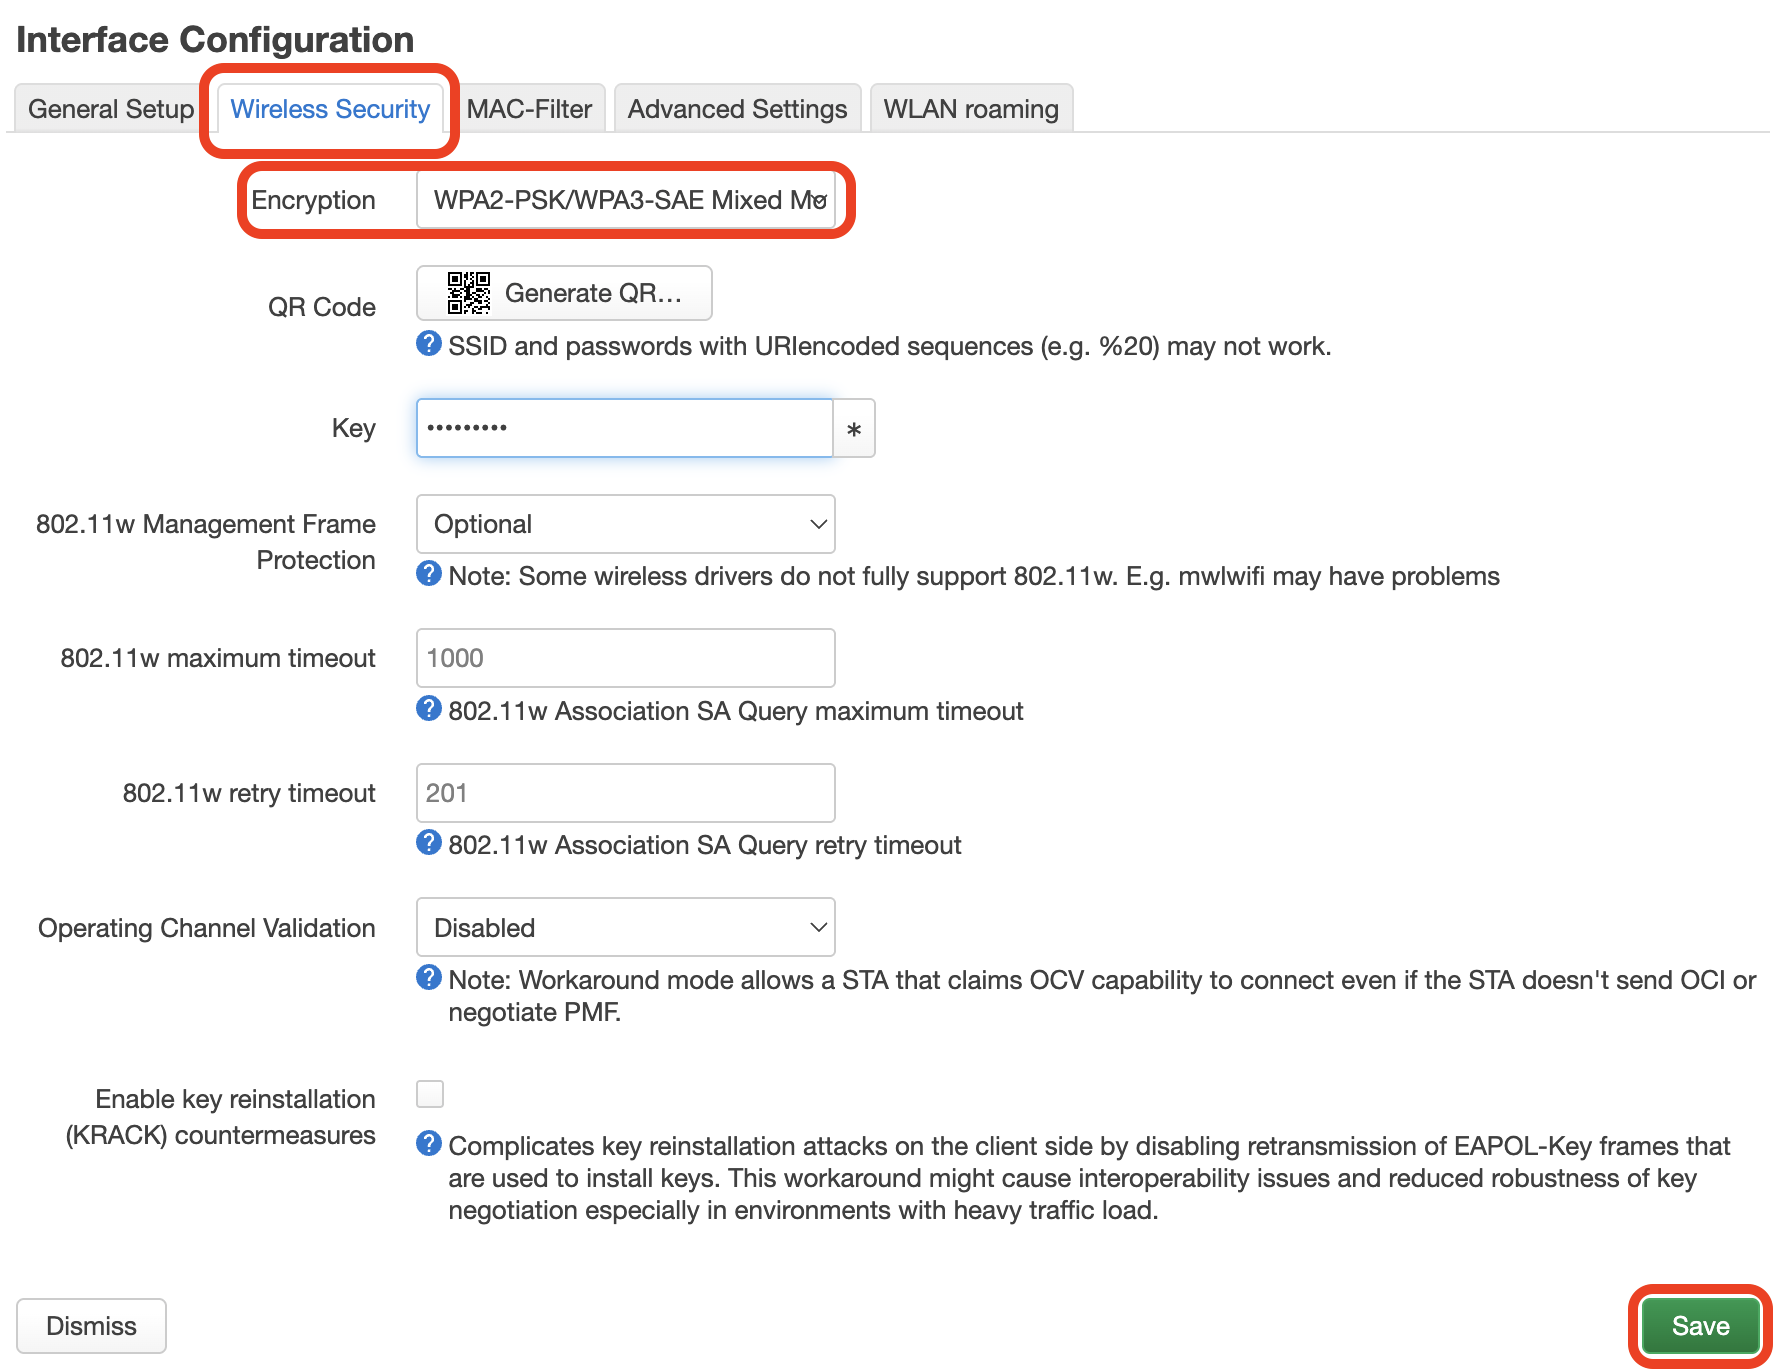
- Scroll down to Interface Configuration and switch to the Wireless Security tab.
- Switch the Encryption to WPA2-PSK/WPA3-SAE Mixed Mode.
- Enter Wi-Fi password into the Key field.
- Click Save.
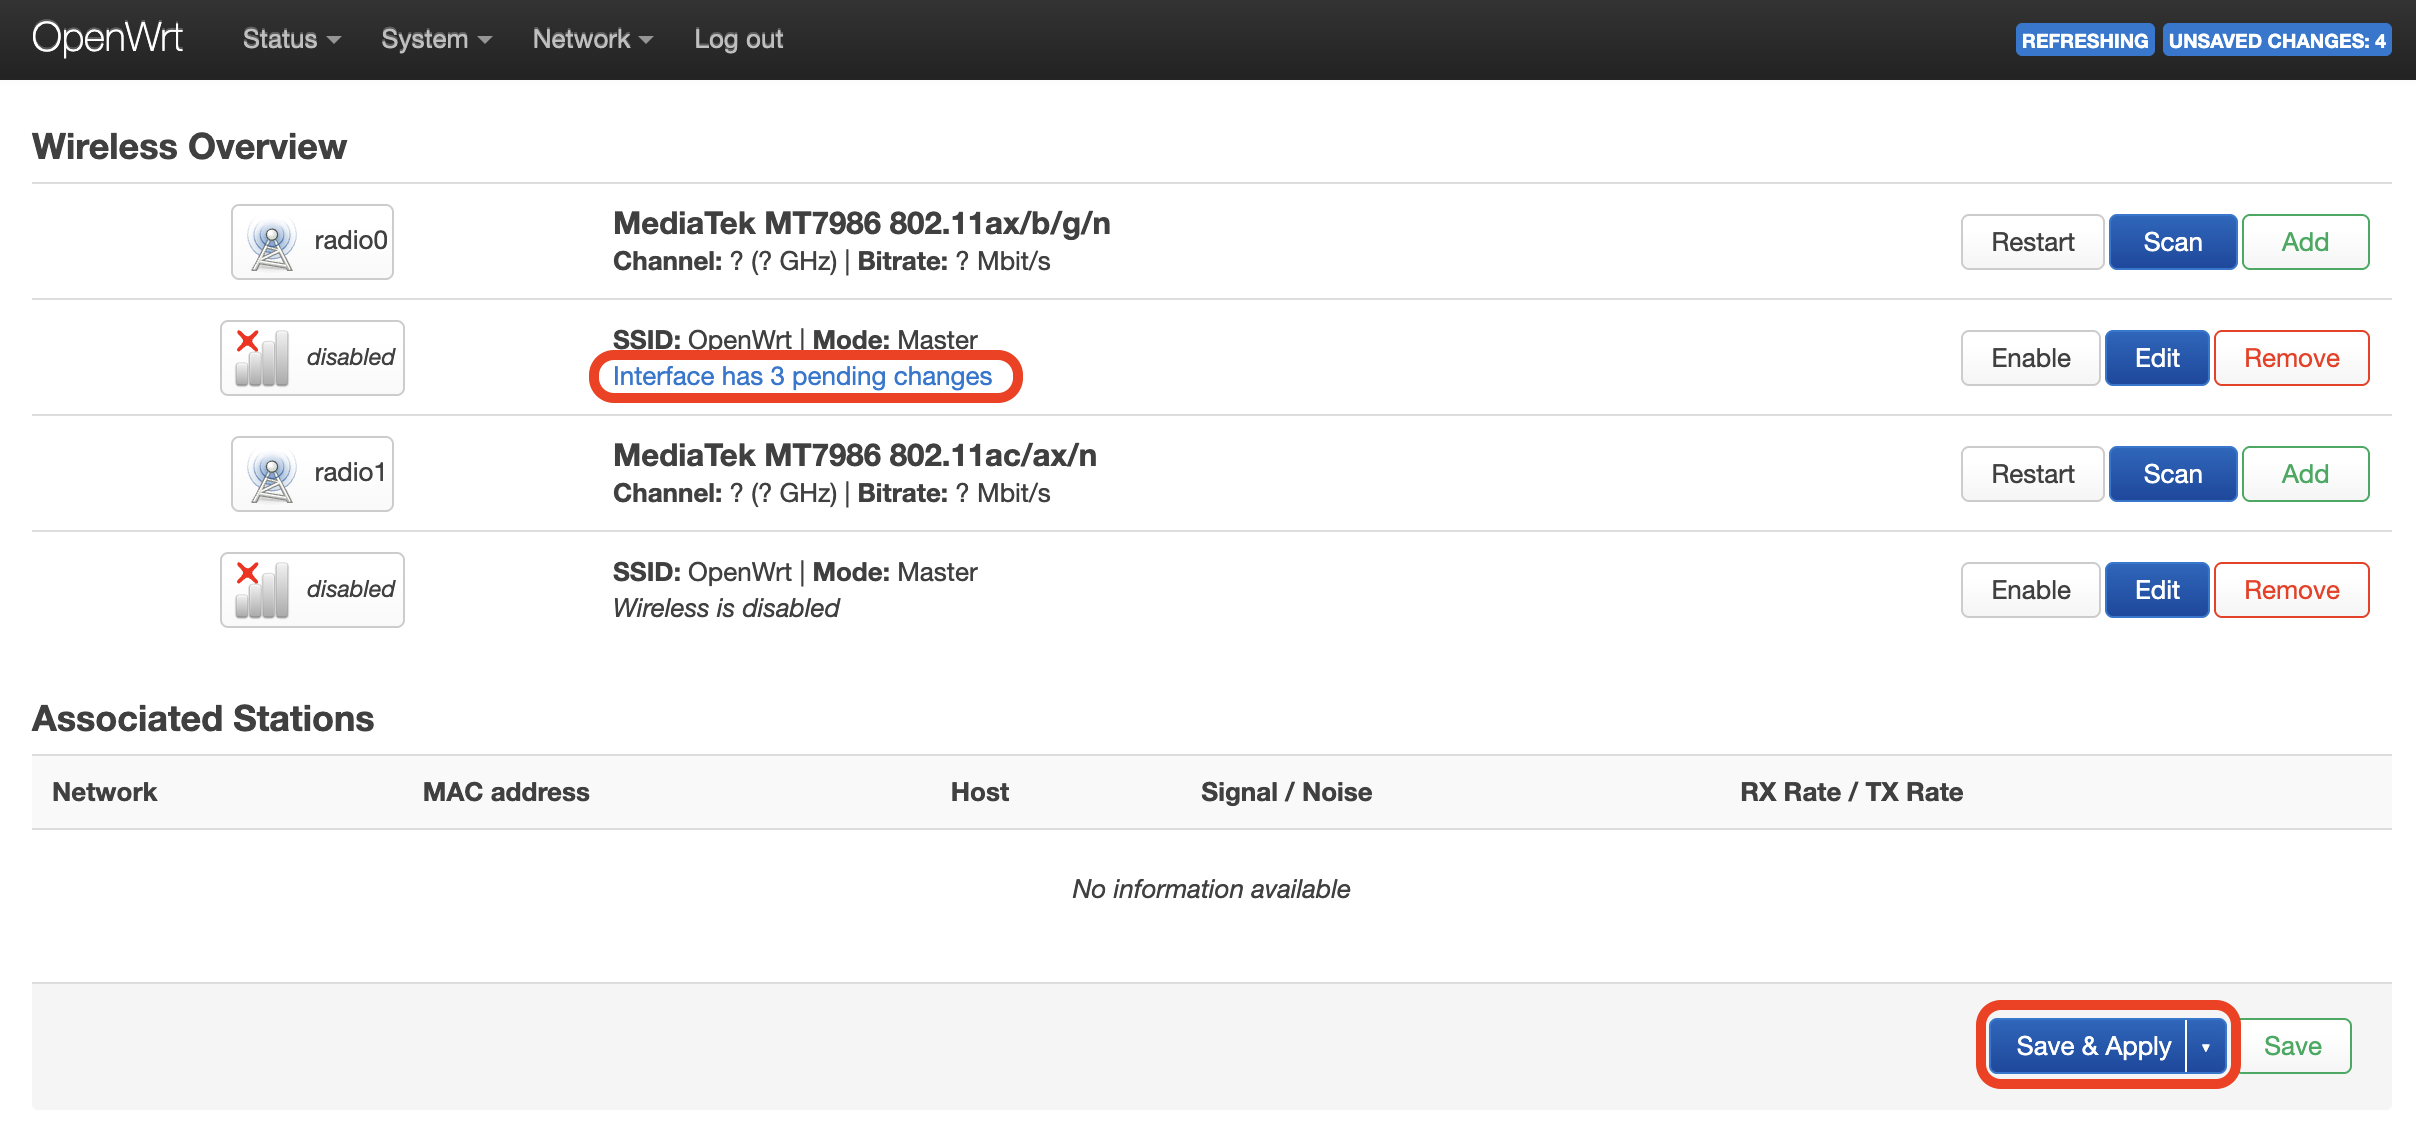
Now Apply the saved settings. We're almost there.
Finally, Enable the SSID.
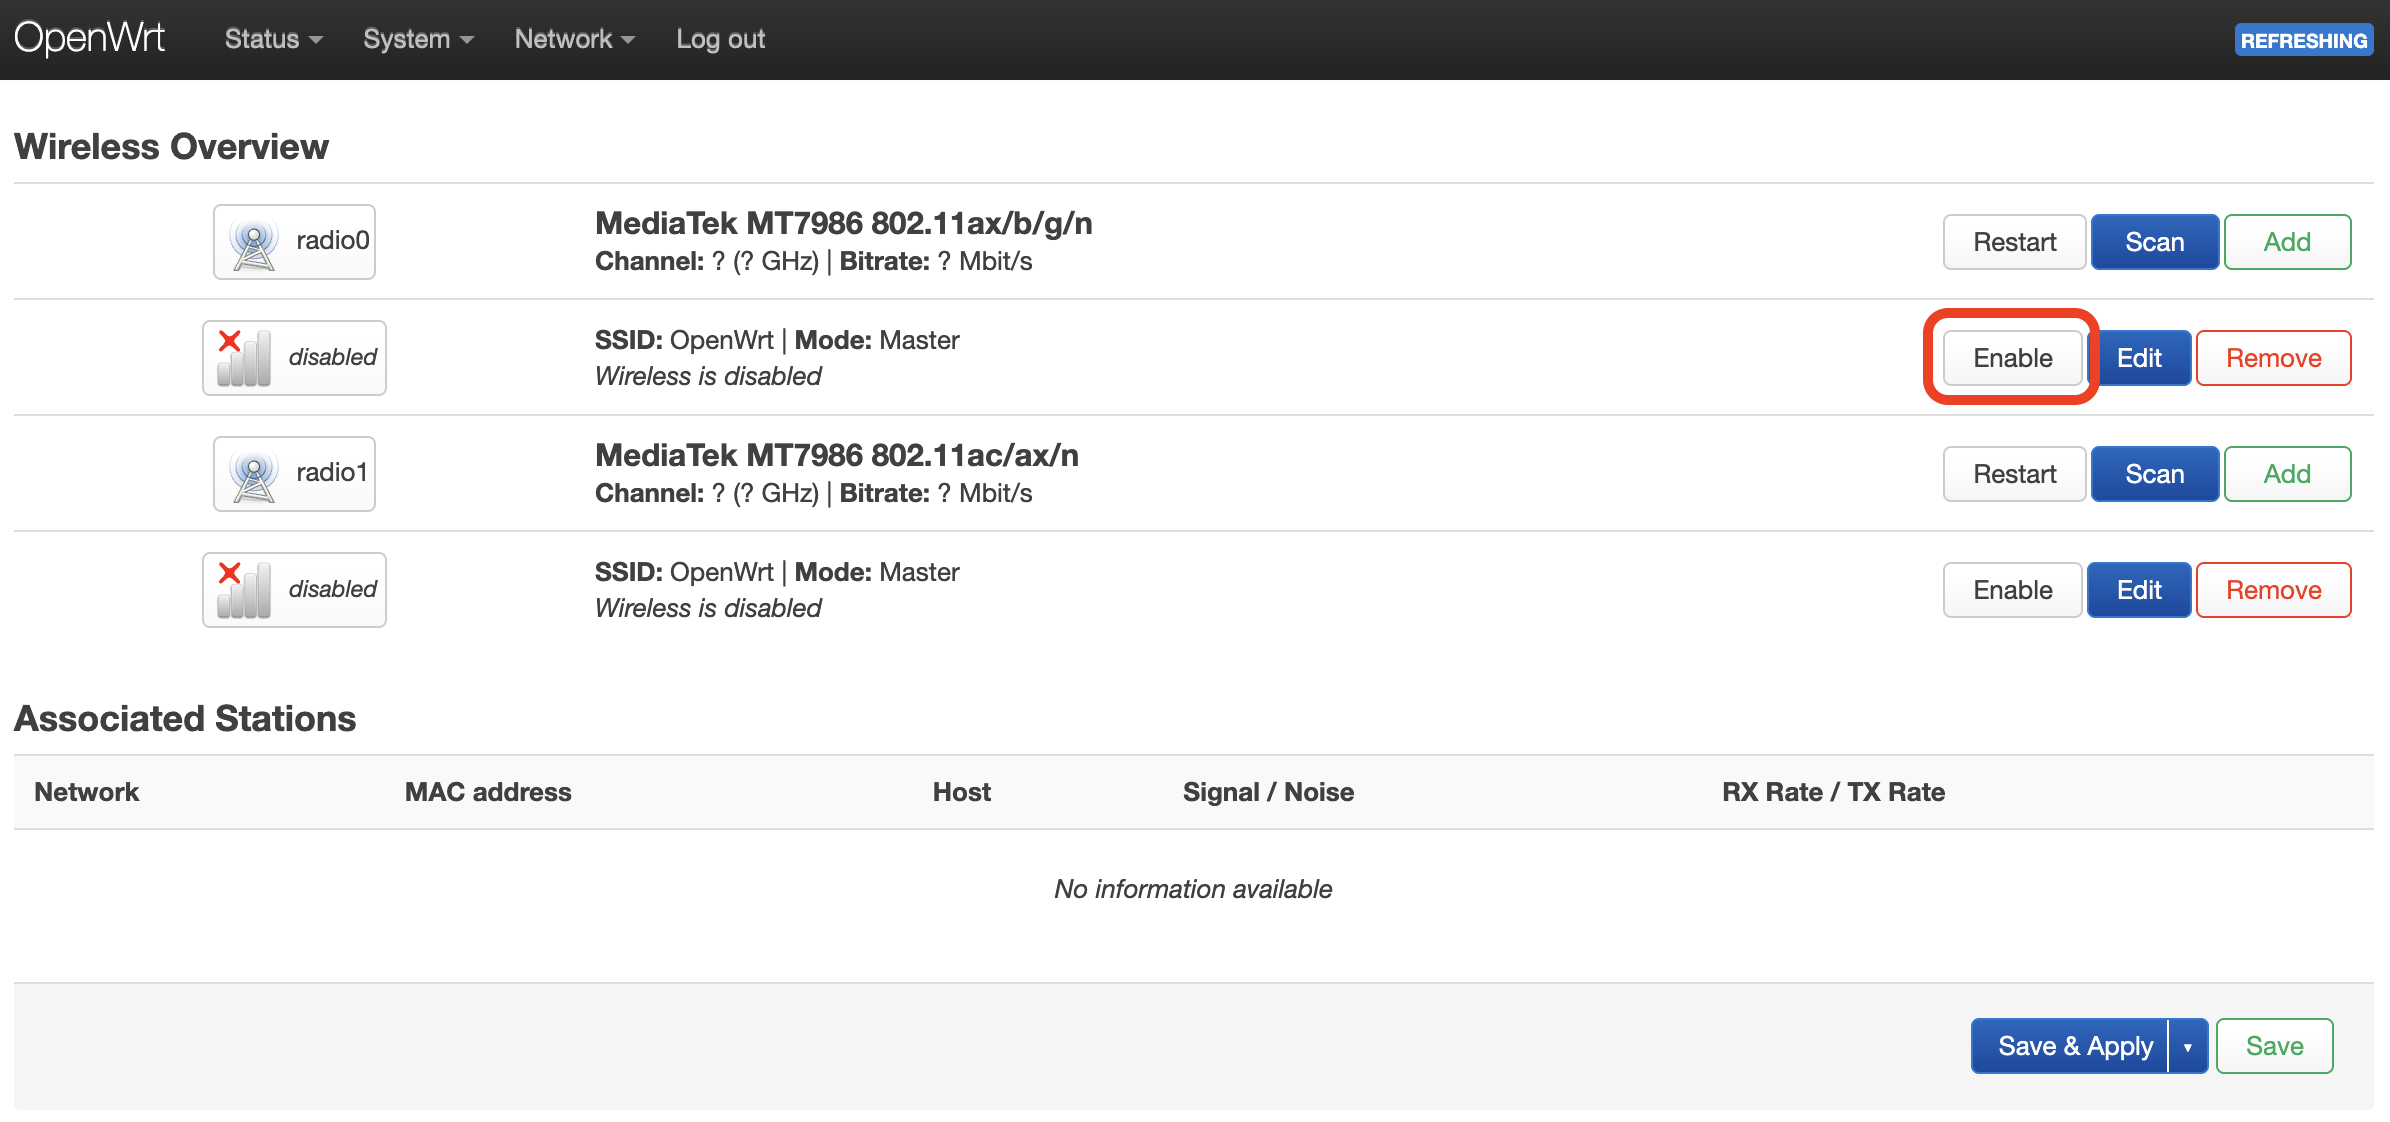
Success! We can now connect to our OpenWRT Wi-Fi.

You may repeat these steps for the other radios.
Note on Radios
Different radios rely on different OpenWRT radio drivers. The quality of these drivers may vary and in some cases it's recommended to disable a "bad radio". Please consult the OpenWRT forum for your particular router to see if any such recommendations exist.